Tuesday, April 30, 2013

Design Elements in Red

My one and only sister is a physically fit, stylishly-dressed woman who could easily pass for an older sister to either of her two grown daughters. Her career in the fashion industry keeps her style sense current. She and her husband are coming from Phoenix to hear the Professor's band, Half Throttle, play at the Main Street Bar & Grill on Saturday. Should be good times.

I love it when she comes because I  get my hair trimmed, slap polish on my toenails if the season calls for it and give my house a thorough cleaning, not necessarily in that order. Procrastinating this morning, I decided instead to make her a little gift. Her signature color is a bright coral-red. A few months ago I found 2 gently-used and 3 brand-new tee shirts in her color at Goodwill. I had planned then to put them together into a skirt for her. So today, rather than fill the house with the smell of a pedicure or cleaning supplies, I pulled out my shiny, new serger and cut up tee shirts.

After cutting these 2 apart, I realized they were not as fine a knit as the other 3 solid colored ones. Fodder for another project.

I had removed the glitter-decorated section from the fronts of the other 3 shirts and washed them months ago. Today, setting aside the detached sleeves, I cut the remaining body of each shirt into 3 of the 4 pieces needed before realizing I didn't have enough fabric left to make the skirt! I nearly gave up at this point until remembering the 6 detached sleeves piled beside the serger. Piecing these long sleeves together, I created enough fabric to cut another piece for the skirt front and the waistband.
Here is the finished "reversible" skirt.
 Did I mention that I'd never previously made anything with my serger?
Notice the interesting design lines created by my need to piece fabric.  I often say that mistakes and lack are often the place where creativity is born. Today that was certainly the case.

And here's what the other side looks like. I'll let you know how my sister liked it.

Monday, April 29, 2013

Artful Briefcase

This unique, hand-painted briefcase up-cycle has been simmering in my mind for quite a while. Today's sunshine lured me out of the studio armed with an old briefcase,  masking tape, extra fine grit sandpaper, a clean rag and some rubbing alcohol. First I taped off the area I planned to decorate.
Once the section of the case was taped off, I took a fine grit sanding paper to the taped off area. I didn't have a really fine grit sandpaper, but I used the finest I had to rough up the surface of the briefcase. The point here was to rough up the surface and give it more tooth to hold the paint.
Once I had sufficiently roughed it up, I carefully wiped it with a clean cloth soaked with Rubbing Alcohol to remove any remaining finish I might have missed while I was sanding.
Next pre-painting the area. Mix equal parts of water and paint. I used a mixture of Primary Cyan and water with a couple of drops of Carbon Black.
Apply the watered down paint to the taped off area. Do not let each coat dry completely before adding the next coat.
These layers of paint (I used 3) will appear streaky and should be moved and creased as they dry in order to keep the paint from cracking.
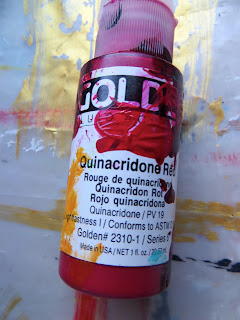
After the third coat, I added the first coat of undiluted paint, using Golden Quinacridone Red fluid acrylic.
After this coat was completely dry, I added a second coat and allowed this to dry completely as well.
Then came the final designs. A few silver and black lines and a peaceful face were added.  This briefcase will be available in my Etsy Store if you're interested.

Friday, April 19, 2013

Share the Love

Found this article on information about love and connection interesting. Check it out:
Ten Things You Might Not Know about Love

Be careful, you might learn something!